A while back I cajoled a friend of mine to run the A-series for our group so that I could experience them as a player before I run them myself ... our group usually plays 5e (it's the Jungles of Chult group, and we also crawl in this referee-friends homebrew dungeon with a different set of characters), so we don't do the A-series games often, but we did finally do the first half of A2 last night (A1 we did last year some time ...).
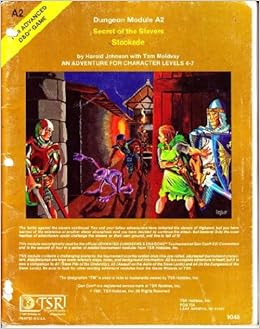
In A2, the characters, having dealt with the temple and "undercity slave pits" detailed in "A1: Slave Pits of the Undercity", move on to deal with the slavers' fortress-stockade in the hills above the city of Highport. The first half of the module A2 deals with the fortress itself, while the second half deals with the dungeons beneath (they were originally separate parts of the first round of the tournament at GenCon XIII).
------
So last night we tackled the upper stockade, which is basically a fortress full of hobgoblins. The walls are manned by regular posts of guards, there's a full roster of hobgoblins in the barracks (which number we learned about partway into our foray), and it generally seems like a tough nut to crack for players trying to infiltrate their way in. We were given a couple goals: 1) free the slaves (for a pittance per freed slave or a major boon for all of them freed), 2) a bounty for each hobgoblin killed, and 3) a serious bounty for proof that the slaver leadership was dealt with.
Given those goals and looking up at the blank face of the walls ... we were paralyzed by a lack of information. We searched the dry moat around the fortress for secret entrances to no avail (and magically slept some guard dogs along the way), and ultimately decided to climb our way up into the gatehouse with a thief with a rope.
We managed to distract guards on the walls with an illusion of apes attacking the walls (supported by another attack of real apes elsewhere on the walls) and make our way to the nearest door ... and heard voices behind it. Still wanting to be sneaky, we went around to the other side of the gatehouse, and there ambushed a couple of door guards and a "squelcher", a goblin thing that left behind oily black footprints (turns out it was a "boggle"). We killed them under a silence spell; then dithered long enough that more guards showed up and we had to fight them, and then they went to ring a gong.
This almost alerted the entire fortress, except my Elf character knows the hobgoblin tongue, and she called out that it was all a false alarm, and our referee was generous with the reactions that he rolled.
Ultimately, we managed to capture a few hobgoblins, and another character of mine, a thief/magic-user, charmed one of them with a spell. This was our breakthrough; we talked the fellow into taking us to the leadership so that we could talk through a business deal, and he went for it. While he led his one friend along seeking the leaders, the rest of the party followed behind under cover of invisibility 10'.'
Finally, we found ourselves in a courtyard with a fountain; a number of clearly badass NPCs showed up wondering who we were. A brief parlay ensued (actually, they offered to join my main character's chaotic cult with an absurdly high reactions roll ... but the rest of the party wanted to kill, and so they fireballed the bad guys while my guy's tears of failure and loss turned into steam from the fireball in front of him). And with that show of force and murdering of the leadership, we impressed the hobgoblins into surrendering the slaves to us and possibly hiring themselves out as mercenaries for my cult.
Whenever we play again, we'll be tackling the dungeon ...
------
Long story short, we didn't actually interact with very much of the module. We interacted with maybe half a dozen of 39 or so keyed locations on the map for the stockade. So from a player side I can't speak to the wealth or dearth of good material ...
What I can say is that I seem to recall reading somewhere (can't find it now) that A2's stockade was a notoriously difficult module to tackle for players, given that it's a fortress full of alert guards, and without much information where to aim a decapitation strike or to seek for treasure. It seemed to live up to that trouble in our play-through--sure, we had a generous DM who allowed our pathetic attempts to call off the alarm work, but if we hadn't done that, we'd have faced the entire garrison of hobgoblins, and even the -2 AC of our pregen ranger might not have saved her skin. Plus, one of my characters has a ring of invisibility, which is about the most useful thing ever for sneaking and all.
On the flipside, though, we dealt with the leadership easily once we got them out into the open where we could fireball them from surprise (hold person knocked another badass NPC out too). So the session was also a reminder that player chutzpah is probably more important a thing than any character's attribute scores ...
But the REAL thing I wanted to comment on was ease of use at the table--because it was clearly NOT easy to use at all, and made it clear to me that I'll have to do a lot of prep work with this module before I actually run it. Our game ran for maybe five hours, but the amount of material we covered could probably have been done in three. Our poor referee had to keep flipping back and forth through the book, digging through the room descriptions for key information.
The map of the stockade is split with two different color-codes. Half is shaded blue, the other half left white; we originally thought that must mean that a space is open to the air or not, but in retrospect I suspect it actually delineates tournament areas from module areas. In A1, at least, the module declares which areas are which; but A2 has no such delineation, letting the referee muddle through on his own (unless I'm blind and it does say it somewhere in the description).
Beyond that, it seemed like several rooms involved his checking the map several times for orientation, and checking the description to make sure he had everything prepped in his head. And still sometimes he had to go back ... e.g. the module is "supposed" to open with the characters climbing a rope up the wall left behind by an escaped slave; but our referee, reading that a rope hung below a guard post, assumed that each guard post must have a rope hanging from it. Only later did he redact it (fortunately without us having climbed any yet), when he finally read the relevant information that it was the escaped slave's rope.
All in all, it was a fun adventure--infiltrating a fortress was definitely a test of our wits! And it seems like the information within was solid, just not well-presented. Perhaps with a little more preparation (or editing), this module could be run smoothly and would provide a great challenge for characters who think they can solve every problem ...
No comments:
Post a Comment